Screenshot on Mac: Ways to Snip Mac Screen via Keyboard Shortcut & App
Did you just bought a new Macbook but don’t know how to take screenshot (ss) on it? This guide has discussed all the methods to take screenshot on Mac via keyboard shortcut, built-in menu, touch bar, and third-party software.
The screenshot on Mac is a picture of your MacBook’s screen. Taking a screenshot is essential to save something important in the form of a visual or picture. The common advantages include capturing the screen of an error report, a message, an online graphic, an image, or everything important to save digitally to use later.
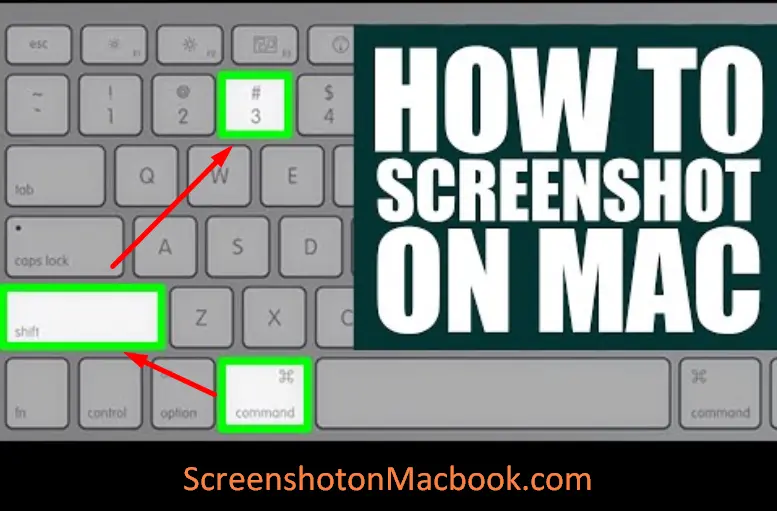
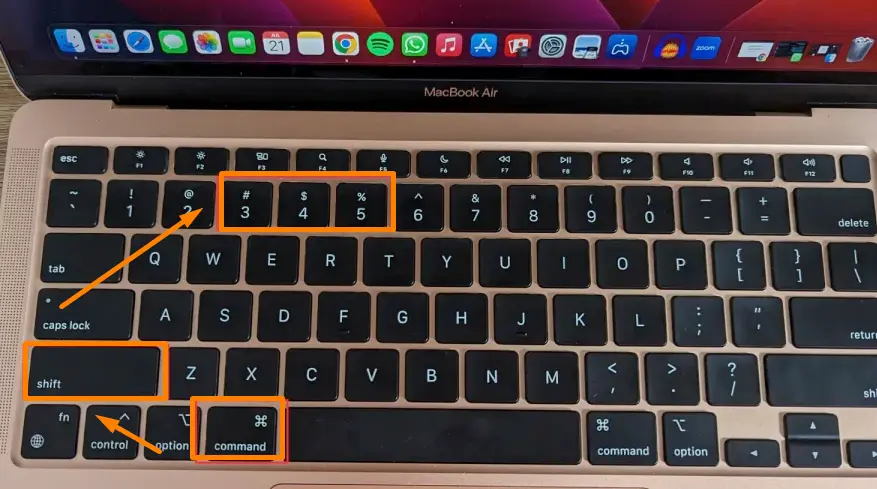
It’s a simple process: press and hold Shift+Command+3 buttons to capture a screenshot on Mac. For editing, click the thumbnail icon in the corner of the screen. Take a screenshot (ss) of any screen with this keyboard shortcut or use third-party apps, software, or browser extensions. The screenshot tools on Mac feature select screen, editing, scroll shot, and more.
To help you, this guide will explain a couple of methods to take a screenshot on Mac. You will learn about different software, keyboard shortcuts, browser extensions, and built-in tools to capture your Mac’s Screen. Read it thoroughly to understand how to screenshot on Mac and pick a suitable way according to your MacBook’s version.
How to Screenshot on Mac: Shortcuts
Here are the key takeaways from this article regarding all the screenshot shortcuts. If you don’t have enough time to read the complete guide, try these screenshots using a standard MacBook laptop.
| Function | Keyboard Shortcut (Press & Hold) |
|---|---|
| Take Screenshot of entire screen on Mac | Shift + Command + 3 |
| Take a screenshot of a portion of screen on Mac (Partial Screenshot) | Shift + Command + 4 |
| Take a screenshot of a specific window on Mac | Shift + Command + 5 then Space bar |
| Take a screenshot from the built-in app on Mac | Shift + Command + 5 |
| Take a screenshot on mac with Touch bar | Shift + Command + 6 |
| Open saved screenshot | Shift + Command + 5 |
Note: Personalize these shortcuts on the keyboard by navigating to Keyboard settings. Go to Apple Menu > System Settings > choose Keyboard from the sidebar. Further, click the “Keyboard shortcut” option and customize.
What is Screenshot on Mac?
A capture of the present screen saved in the form of a PNG or JPG file is called a screenshot (ss). It might be the exact content on your MacBook display, a portion of the screen, a scrolled webpage, or more. After taking a screenshot, you can save or edit it for future reference or publish it elsewhere.
It’s a convenient option to share a message, an error screen, or save something for future reference, like a witness. It’s a small tool but helpful for office workers, teachers, Freelancers, and everyone working on computers in many situations. Switching from Windows Laptop to MacBook looks incredibly difficult, but this guide will make it a breeze.
How to Screenshot on Mac: Simple & Quick Methods
Screen capturing has become an essential tool for everyone working on a MacBook or IOS computer. It comes as a built-in option in all MacOS versions. However, there are several software available online designed for advanced screen capture and editing.
With third-party tools such as Lightshot, you can quickly take a screenshot with a keyboard shortcut (full screen or partial screen capture) with a pre-save editing feature. It’s a masterpiece and a time-saving tool to save screenshot editing with your requirements in a few seconds.
To help you here, we have listed and explained all the old and modern methods to take screenshots on MacBooks.
Method 1: Screenshot on Mac with Keyboard Shortcut
Best for: This method is the quickest but is limited because you can’t edit it. It also takes full-screen capture, limiting the feature of a partial screen capture.
This method works on all Mac devices such as Mac laptops, Mac Mini, iMac all-in-ones, Mac Studio desktops, etc. Let’s know how to use it.
Screenshot of Entire Screen on Mac:
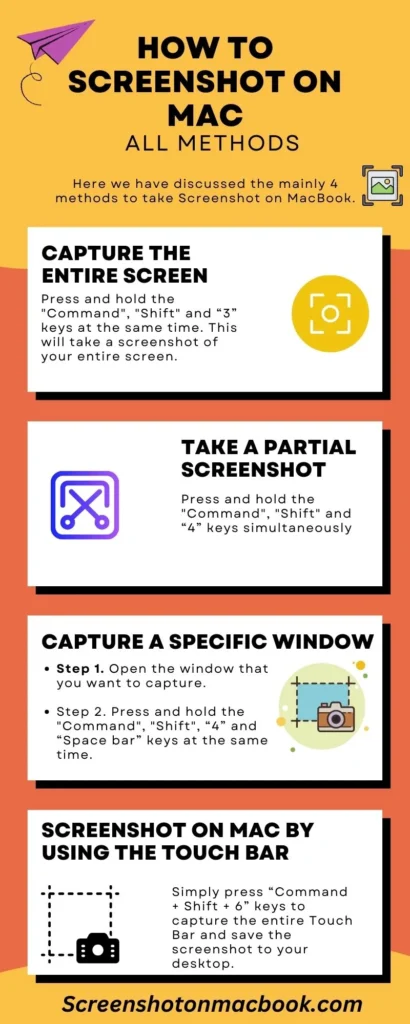
Press and Hold the Command+Shift+3 keys simultaneously to take a screenshot of the displayed screen. After that, a floating thumbnail will be displayed on the bottom-right corner of the screen. It shows the default location to save the capture but also helps edit it. Click here to edit the thumbnail, like crop, draw something, etc. This method is useful to troubleshoot an error, share virtual data, and showcase certain website elements.

How to Screenshot a Section on Mac:
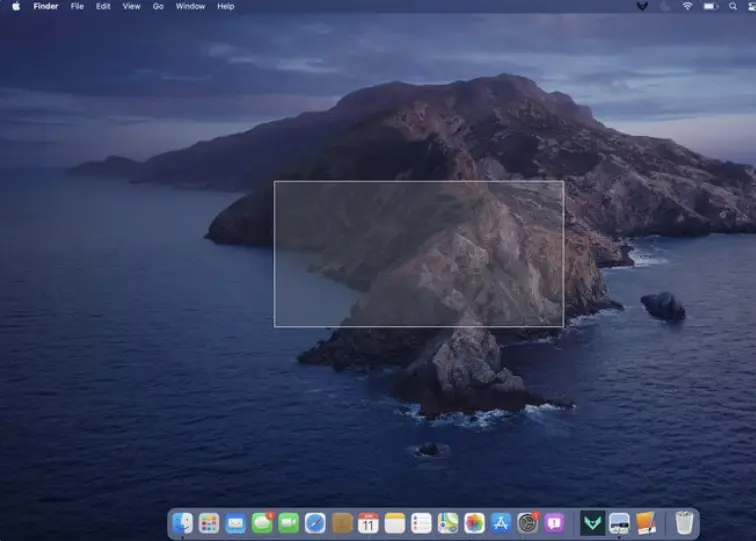
Suppose you want to take a partial-screen capture on a MacBook; press and hold the Command+Shift+4 buttons simultaneously. Now, drag and select the area with the cursor of the mouse. Hold the button till selecting the area and leave when completed. A thumbnail will be displayed in the bottom right corner; click that option for further editing. It’s helpful to showcase any specific error or a certain part of a window.

Screenshot of a Specific Window on Mac:
First, navigate to the window that you want to capture. Press and hold Command+Shift+4, then SpaceBar simultaneously. The program will update the cursor with a camera icon and click the Minecraft window. The program will capture that certain window showing the thumbnail on the bottom right corner of the screen for editing. It’s helpful for teachers or everyone who wants to teach a skill by showing step-by-step methods.

Important: Screenshots are saved in a PNG file by default.
Method 2: Take Screenshot on Mac via Touch Bar
Best for: This method is for you if you have bought the updated Macbook Pro with touch availability.
It’s most suitable for Macbook Pro, but you can use it in all MacBook versions with a touchscreen. It’s quickest because you can do it in one tap.

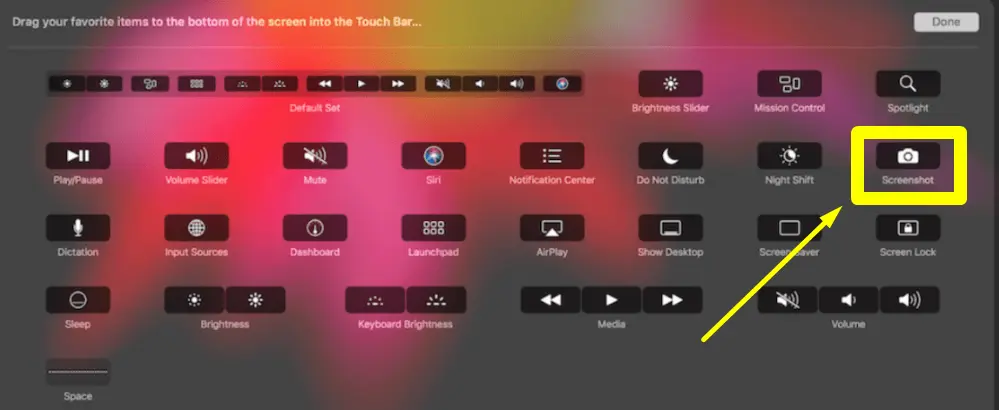
Note: All the screenshots are saved on the Desktop by default. You can change the download capture location from the settings for your convenience.
Take Screenshot via Mac Touch Bar with Keyboard
The developers have added a keyboard shortcut to capture the screen via the touch bar as an additional option. Simply press and hold the Command+Shift+6 keys to capture the whole screen via the touch bar. It will save the capture on the Desktop by default.

Method 3: Take Screenshot with the Mac’s Built-in option
Best for: This built-in menu helps take precise, curated, and high-quality screenshots quickly.
MacOS comes with a built-in option to capture the screen quickly. Mojave, Big Sur, Cataline, and Monterey users can benefit from it. It’s easy and quick; just follow the steps below:

Method 4: Delayed Screenshot on Mac (Screenshot on Recording)
Sometimes, you need to capture the mouse in the screenshot to show a certain menu or take a screenshot after a delay. It’s called delayed screenshot and is now possible with the MacBook’s built-in screenshot app. Here is how you can take a delayed screenshot in easy steps without installing a third-party app:
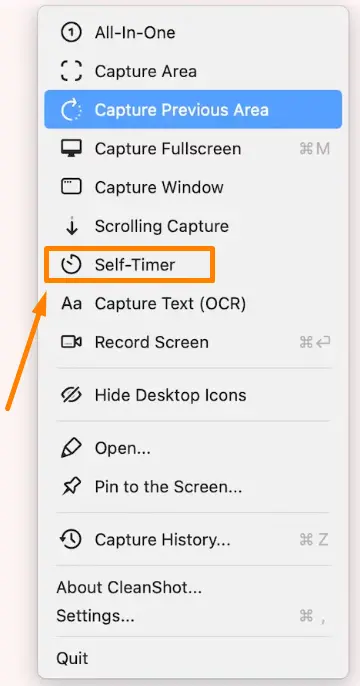
Note: Go to Applications > Utilities folder and find the built-app.
How to Take Scrolling Screenshot on Mac
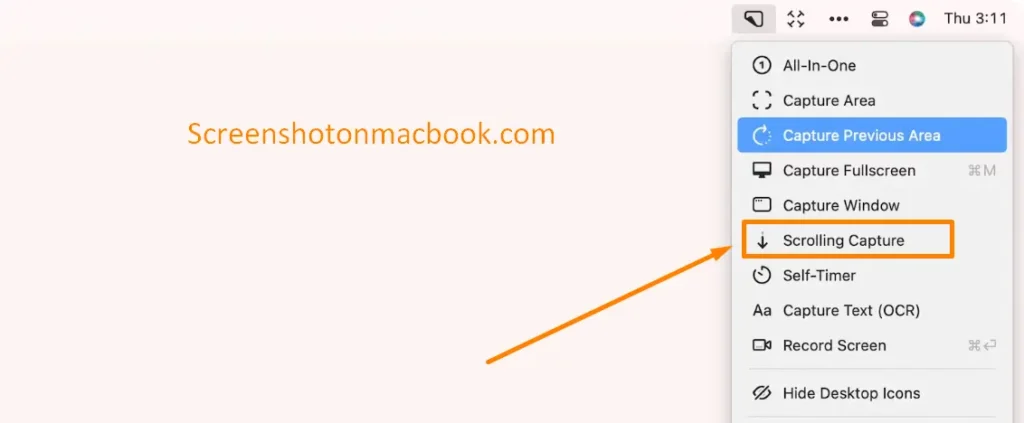
Sometimes, you need to take a screenshot of a webpage, and it’s only possible with a scrolling screenshot. It’s also for capturing an entire conversation on WhatsApp, a Facebook post, and more. There is no built-in option available in MacBooks, but third-party apps like Capto or CleanShot X. Here we have mentioned the procedure for CleanShot X:
Best Screenshot App for Mac
How do you take a screenshot on a Mac with a third-party app? The developers have developed several apps with unique functionalities to take screenshots on Mac. Here, we will talk about LightShot because it’s lightweight, Free, easy to use, and gives the users all the necessary editing functions.
LightShot: It’s a small software app to take screenshots on a Mac. It’s a third-party app and comes with several customization features. Install the app on your Mac, open it from the quick bar, or press the “PrtSc” button as a shortcut.
Select the portion of the screen by holding the cursor and leave. It will give the editing options before saving it. Make the desired edits, add text, and press the disk button to save it.
It’s super easy to use; no need to switch the folders for editing, but you can do it easily on the screenshot window.
Note: You can download its extension for scrolling screenshots of a web page.
Where to find Screenshot on Mac?
By default, all the screenshots are saved to the Desktop. Each visual has a different number “Data & Time) and is saved in a PNG file. If you are using an old MacOS version, you can’t change the location, but MacOS Mojave and later versions allow users to update the location according to their convenience.

How to Screenshot on Mac and Crop?
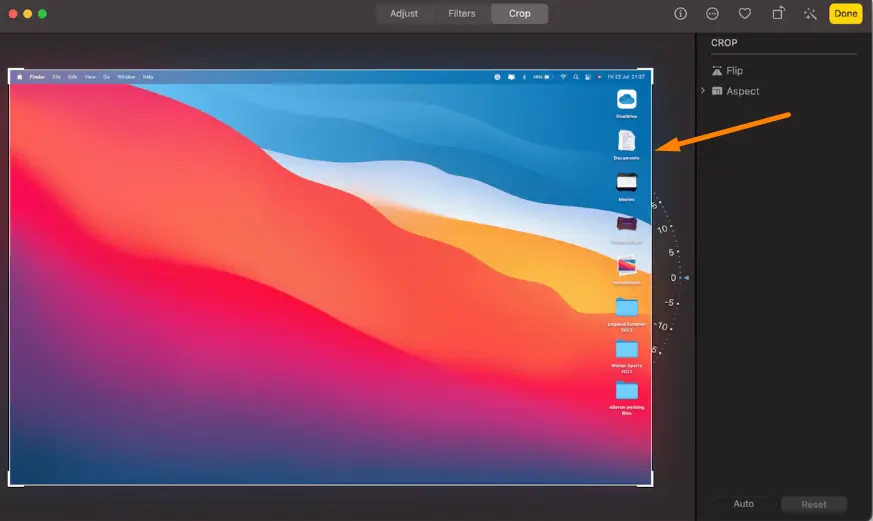
Cropped screenshot on Mac means taking a screenshot of a specific area on the screen. Press and hold Shift+Command+4 and select the specific area (cropped). Release the mouse, and the snip will be saved automatically. Furthermore, you can edit the screenshot by taking the image to the paint or other editing apps.
How to Delete a Screenshot on Mac?
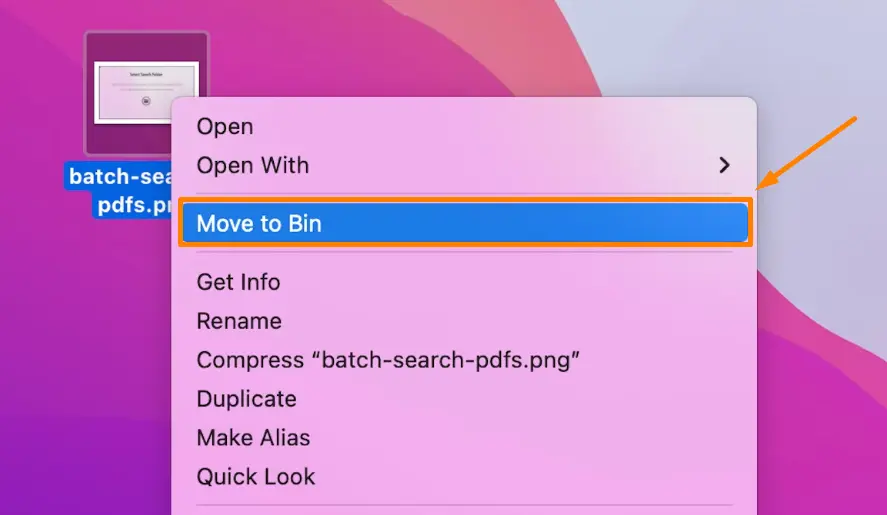
If you want to clean up the space or not use the recently taken screenshot anymore, deleting it is the best option. For it, press Command+Delete to delete the selected screenshot.
You can also open the Desktop screenshot folder, select images, and right-click to delete them. Lastly, press the Option+Command+Delete buttons to delete the selected screenshot permanently without moving it to the trash. MacOS also allows automatically deleting screenshots to clean up your space from the settings.
Screenshot on MacBook Air
MacBook Air has useful functions, and it’s easy to take a screenshot on it, too, like other MacOS. Press and Hold Shift+Command+4 to take a screenshot of a specific window. Press Shift+Command+3 for the full screenshot and Shift+Command+5 for a partial screenshot.
Important Tips To Remember
Here are some essential tips you must take care of:
Conclusion
In conclusion, it’s all about taking Screenshots on Mac. We have shared several methods with and without third-party software and built-in apps. Don’t forget to have a look at each method and pick it up according to your requirements. We recommend you use the built-in tool for this purpose, but if you want customized capturing, third-party apps work best. We hope you will find this guide helpful in knowing every detail about screenshots on Mac.
Screenshot on Mac: FAQ’s
Does the Mac have a snipping tool?
It has a built-in snipping tool for touch and non-touch screens. You can access it by pressing and holding Command+Shift+5 to take a screenshot of a selected portion, full screen, or a specific window.
Can I customize the keyboard shortcut for screenshots?
Go to System Preference > Keyboard > Shortcut and customize each button according to your ease and preferences.
How do you share a screenshot on Mac?
You can send them via Mail, Messages, or AirDrop. Open the screenshot folder, right-click on the image, and click Share through the desired app.
How do screenshots on a Mac without a keyboard?
It’s helpful when your keyboard doesn’t work or you want to use the mouse to take a screenshot. Go to Finder menu > Application folder > Utilities folder. Click the screenshot app icon, select the area, and leave. It will automatically save to the Desktop by default.
Why can’t I screenshot on Mac?
When the hotkeys are not enabled, the system doesn’t allow you to take the screenshot. To resolve this problem, go to Apple Menu > System Settings > Keyboard shortcuts > Screenshot, and customize the shortcuts according to your preferences.
How to disable screenshot on Mac?
Open Systems Preferences > Security & Privacy > Privacy > Screen recording and disable the settings.
What are the 2 easy ways to take a screenshot on Mac?
First, press and hold Command+Shift+3, Command+Shift+4, and Command+Shift+5 with different options like the entire screen, specific window, and a portion of a screen. Secondly, open the Touch bar menu to take a screenshot on the MacBook.
